One of my favorite holiday tasks is wrapping gifts and seeing the excitement on each recipient’s face as they receive their carefully wrapped parcel. Every year I try to stock up on the most beautiful wrapping paper, bows, ribbons, trinkets, and adornments I can find to use when Christmas time rolls around. This year is especially special as it’s our first Christmas with Lachlan. Already the wonder on his face and the way he lights up in the presence of sparkling lights is a memory both Andrew and I will cherish for a lifetime. Oh, and you can bet our Christmas shopping and wrapping was done a long time ago for that very reason!
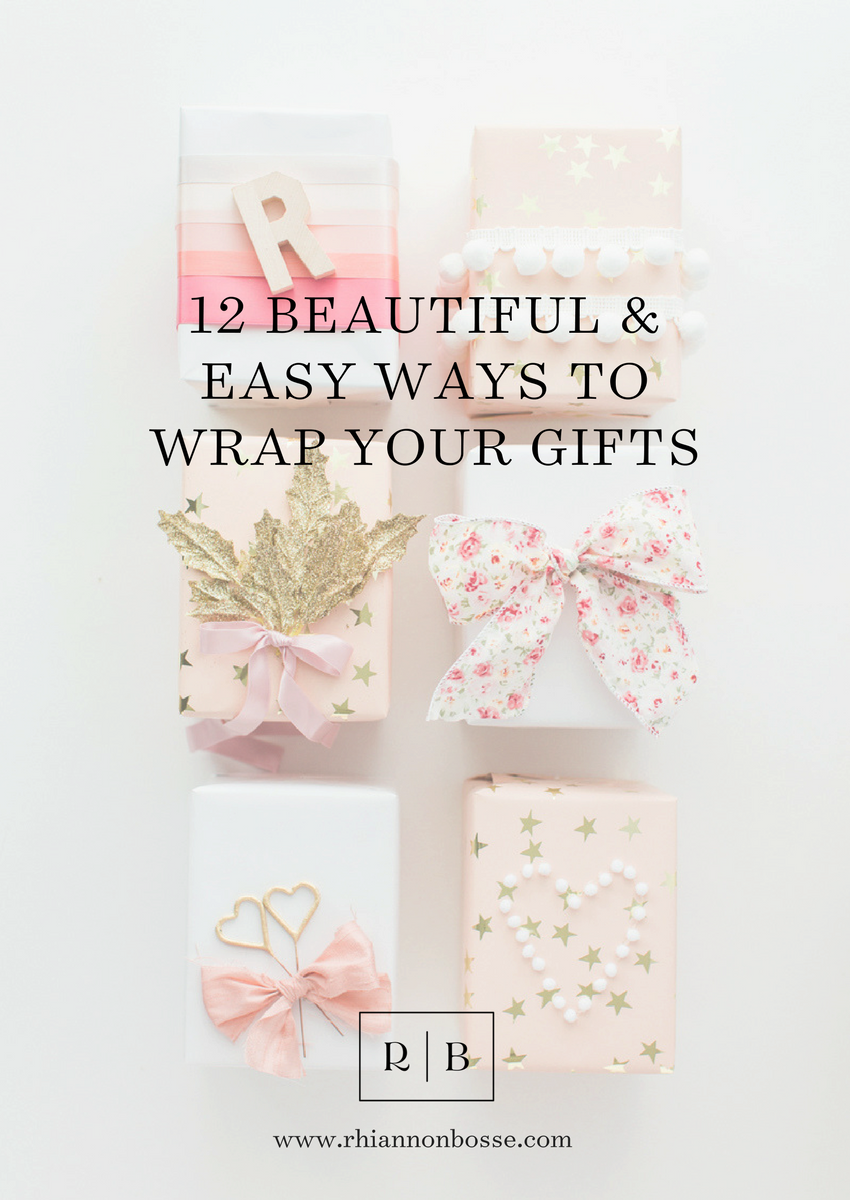
But I know a lot of people like to leave their wrapping until the last minute. And some even leave their shopping until the last minute too. So if you fall into that category then don’t stress and instead let this post inspire you. Using very simple supplies and things found at your local craft store (or in your home if you’re crafty like me), you too can create these 12 easy and gorgeous wrapping looks. My commentary and some helpful how-to tips are sprinkled amongst the pretty photos here by Samantha James Photography.
Happy one week until Christmas, everyone!

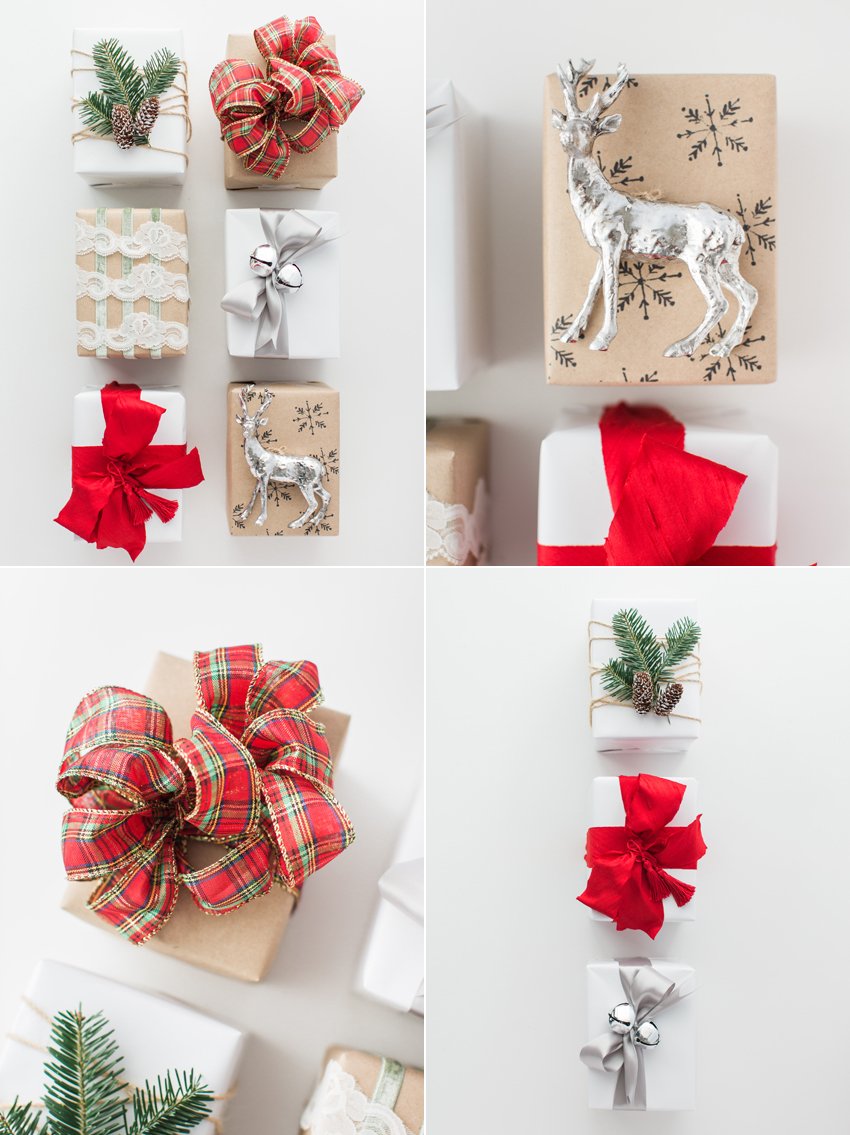
Sam and I decided to first come up with six traditional gifts, three with a Kraft paper base and three with a white paper base. Kraft paper is available at most major craft stores and sometimes can be purchased in bulk making it a staple for not only holiday gifts but birthday gifts too. The white paper was found at Hobby Lobby.
For the three white gifts you can do the following:
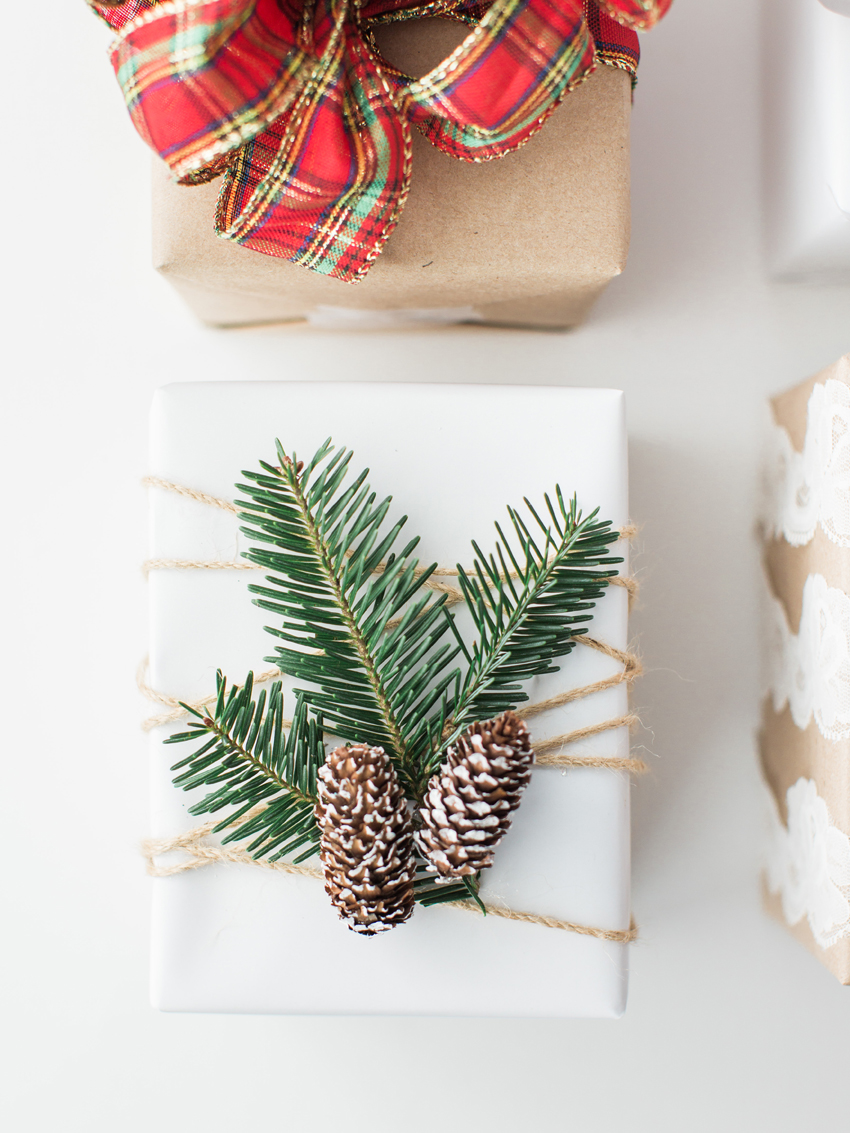
• Using a dab of hot glue, fasten the end of a long piece of twine to the bottom of the box. Then wrap the twine around the box as many times as you’d like making sure to wrap it tightly so the different angles stay put on the top. Glue the end of the piece of twine back to the bottom of the box. Using a bit more hot glue, fasten a piece of a pine bough over top of the twine and then finish it off with two real or faux pinecones.
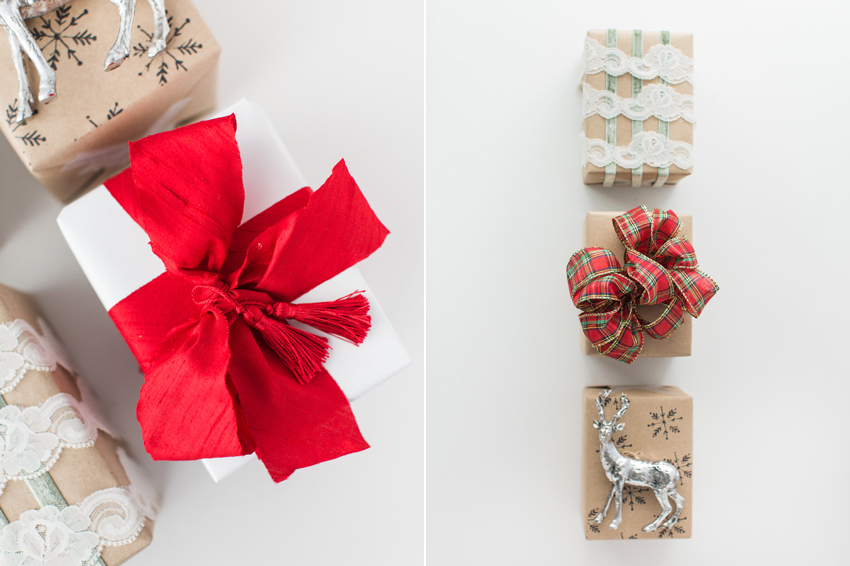
• Using Midori’s killer red silk, wrap your box twice and finish off with a big classic bow. I found those red tassels in the upholstery section at Hobby Lobby and thought they added a little bit of pizzazz to the otherwise classic bow. To get the tassels to stay put, loop the silk ribbon through the tassel loops and tie tightly to secure.
• Using a piece of wide set double faced satin ribbon, tie your ribbon into the crisscross part that comes before the bow. Then string your ribbon ends through two jingle bells before finishing with your bow. Trim your ends as desired and voila! You can also switch up your ribbon color here and play around with different jingle bells; like gold, white, or even ones painted and dipped in faux snow or glitter.
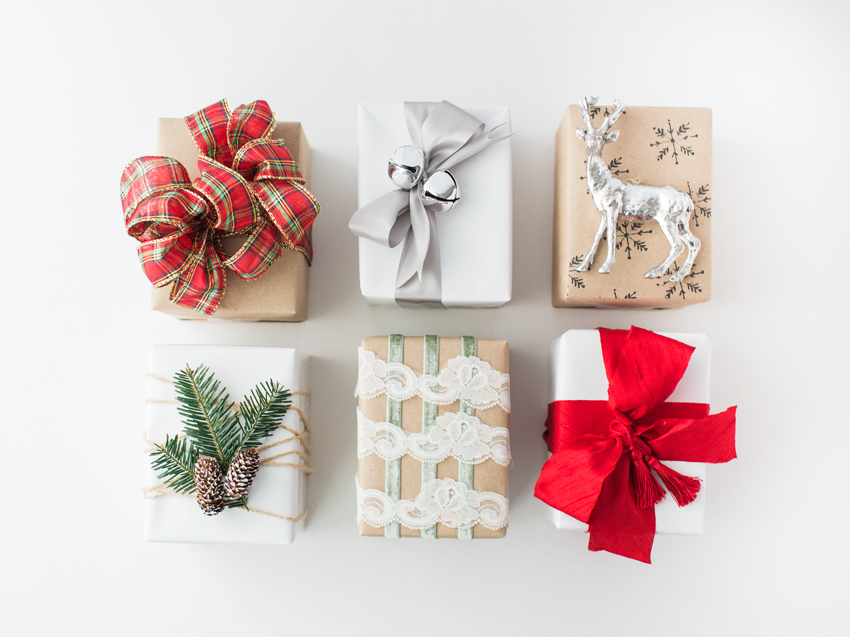
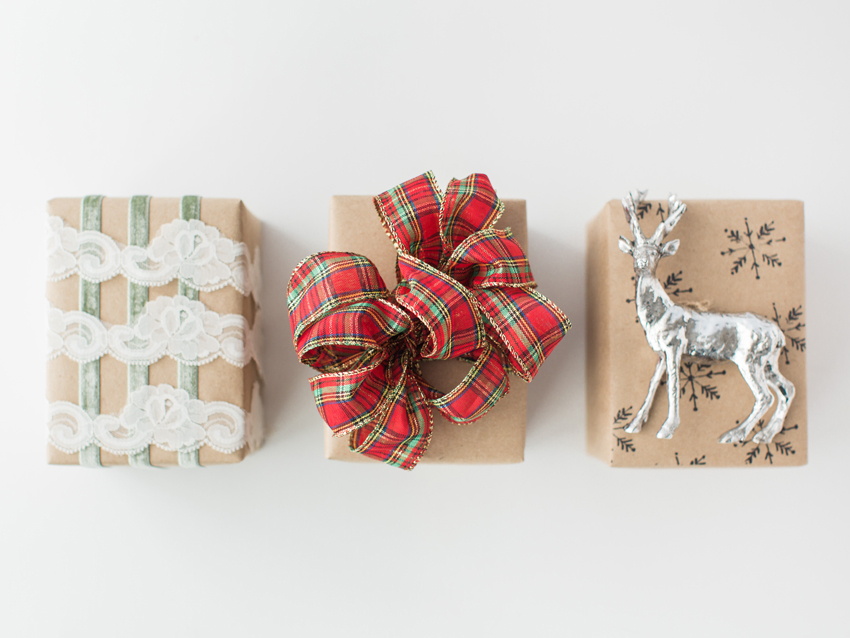
For the three Kraft wrapped gifts you can do the following:
• Using a dab of hot glue, fasten the end of a long piece of sage colored velvet to the bottom of the box. Then wrap the velvet around the box 3 times making sure to wrap it tightly so the velvet stays in place. Secure it back to the bottom with more glue. Then, using a different trim like some ivory lace, follow the same wrapping technique but perpendicular to the velvet. The lace can be found at Michaels in the trim and ribbon section.
• Using a wide wired ribbon, make a series of loops about 1 to 2 inches long, cinching the loops together with your fingers in the middle when each loop is complete. Using a piece of wire, fasten the loops together and then fluff out all of the loops to create an oversized bow as shown. Use a bit of hot glue to attach the bow to the box.
• With an ink pad and stamp of choice (we picked this cute little snowflake), stamp all over the Kraft paper until you have the pattern you want. We stamped the paper AFTER the gift was wrapped but you could totally do it before hand to get a more natural repetition of the pattern. The finishing touch with this wrapping design is to take an ornament and add just a little glue to secure it to the top of the gift. Make sure to tell the gift recipient that the decorative ornament also doubles as something lovely for their tree!
After we wrapped our traditional gifts it was time for my favorite; the feminine ones!
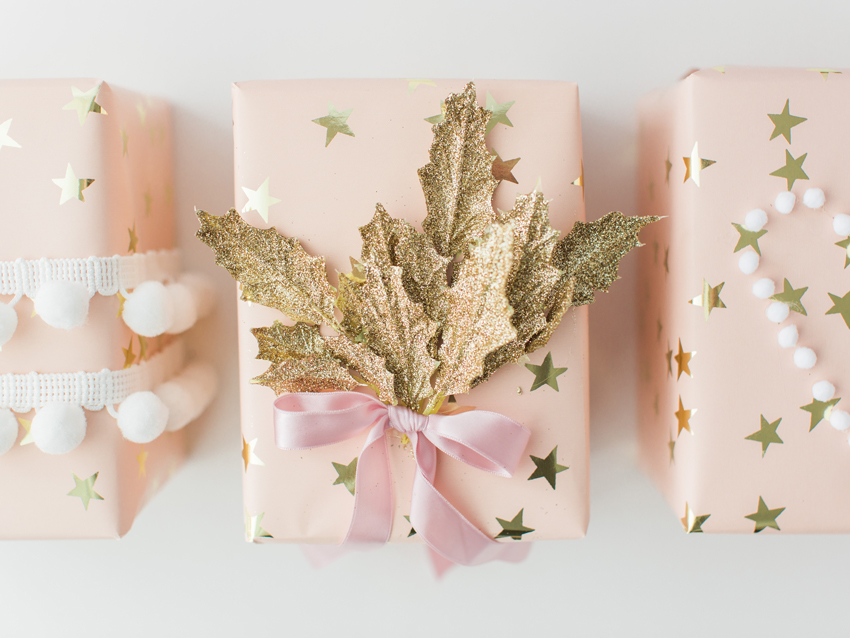
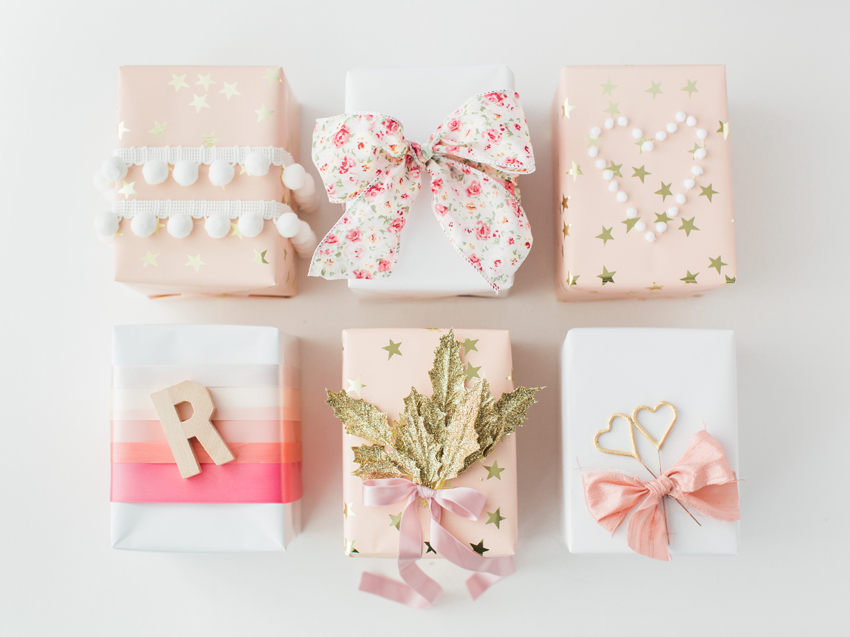
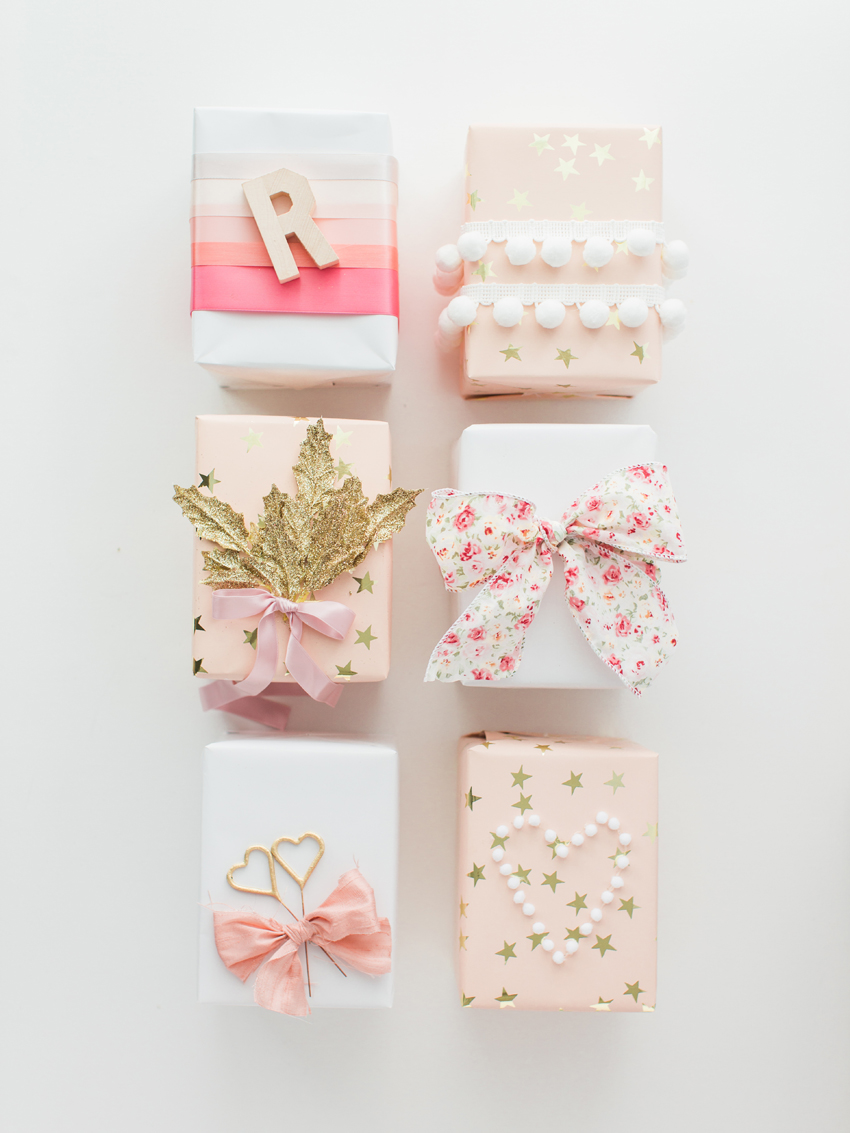
We wrapped three boxes in a Sugar Paper LA pink and gold foil star print paper and three more boxes in the same white paper as used above. Then I had a lot of fun creating these six different feminine and playful looks which could also be used to wrap birthday party, baby shower, or bridal shower gifts too!
To get the pink box looks:
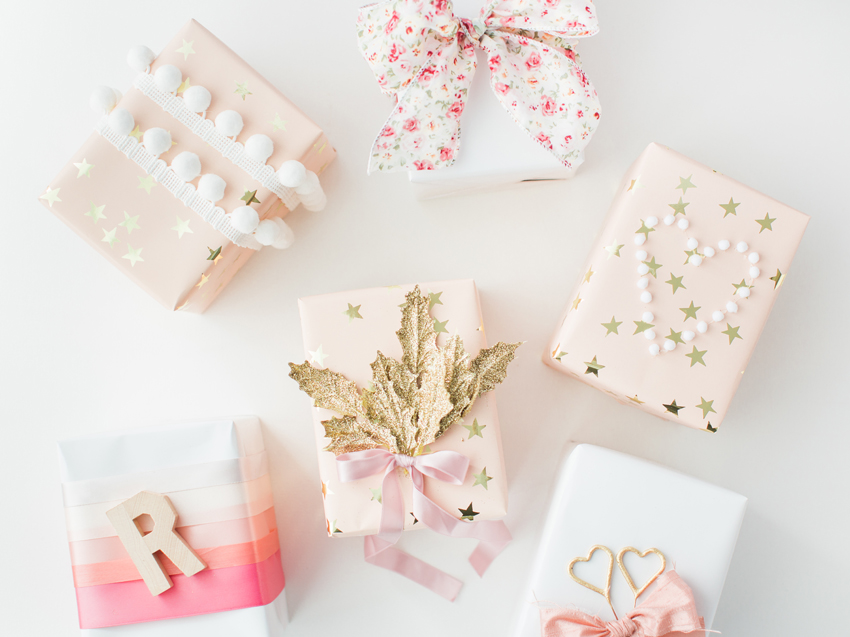
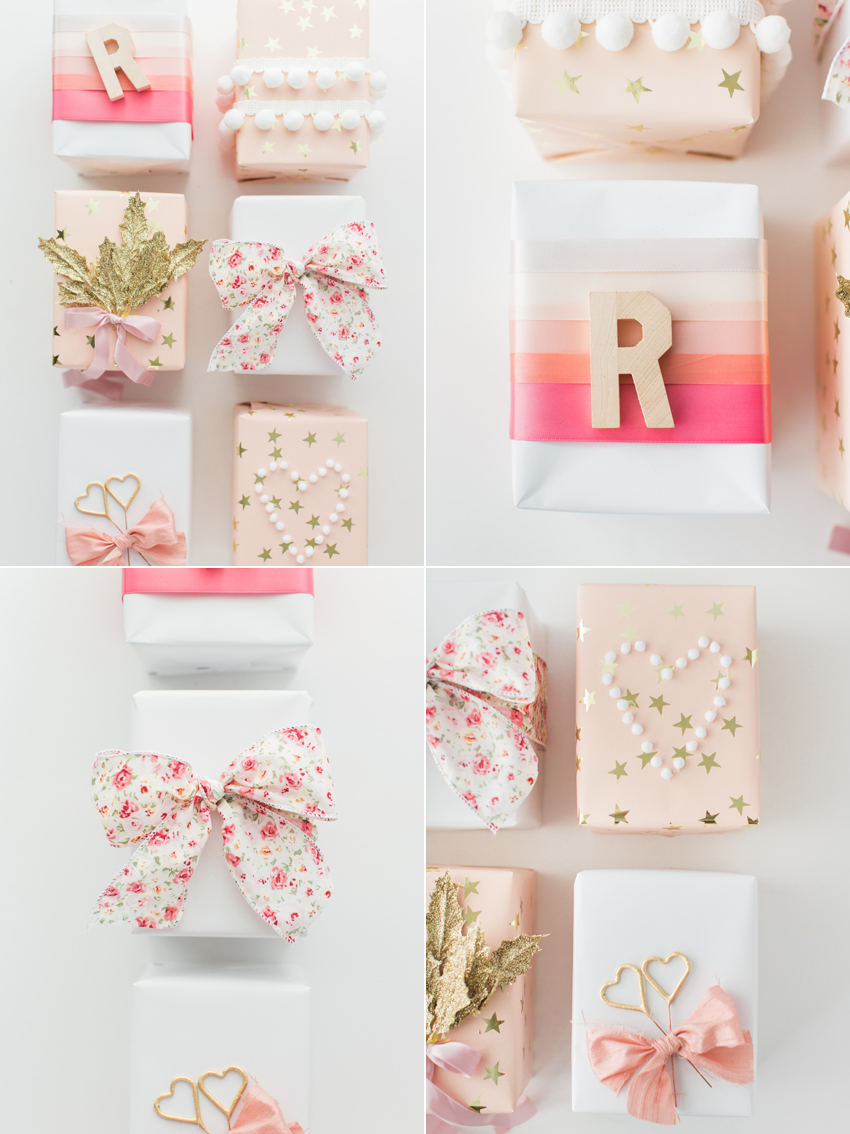
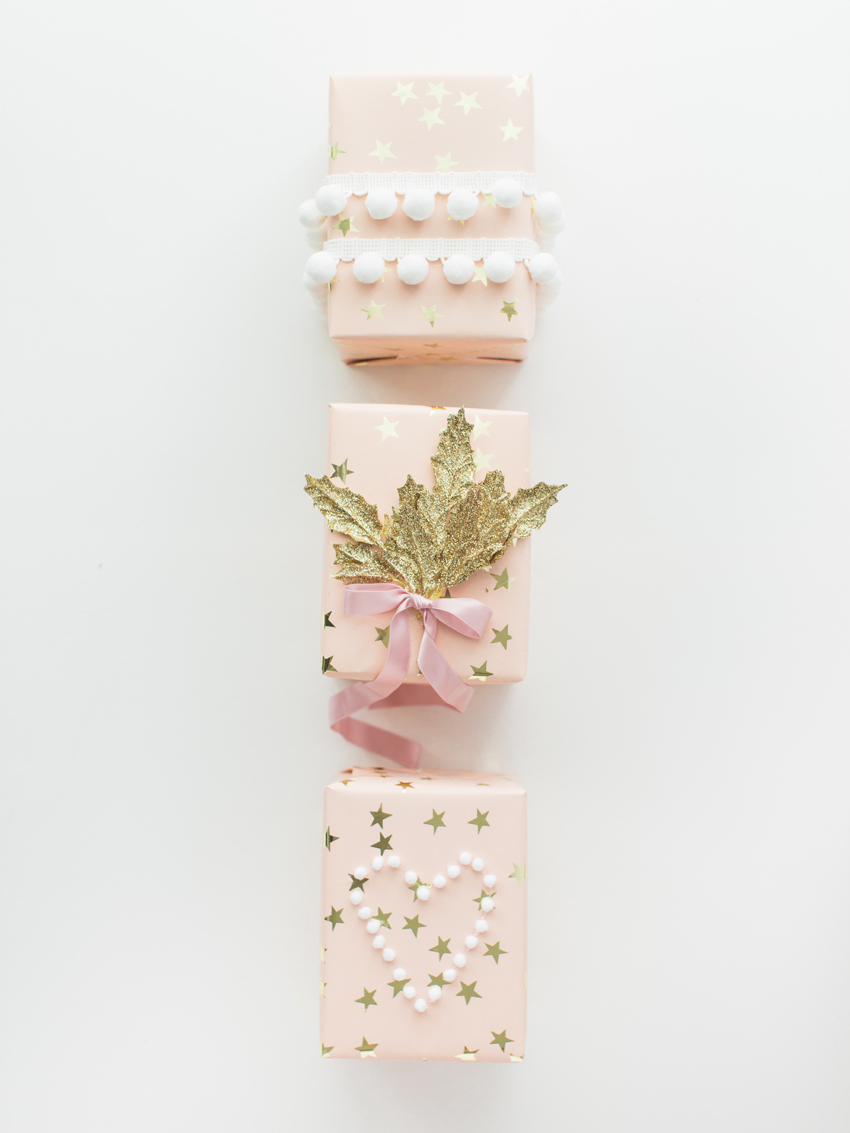
• Using two equal strands of pom pom fringe, hot glue gun the ends to the sides of the box as close to the bottom as possible. I didn’t take the strands all the way to the bottom of the box because they made the box a little wobbly and uneven for the purpose of the photos but you could do yours differently. The pom pom fringe was found at Joanne Fabrics in the trim section which sells by the yard and spool.
• In the holiday section at Hobby Lobby, you’ll find bins and bins of decorative picks like faux acorns, sparkly bows, faux flowers and wintery greens. The glittered gold leafs were found in that same spot. Using only one pick, we cut half of the leaves off and then hot glue gunned them into place. A simple soft pink bow glued over the stems of the glittered leaves finished off this fun (and messy!) but still fun look.
• Cut out a paper heart and with a pencil outline the heart with a series of dots onto the top of the wrapped gift. Remove the cut out heart and use hot glue to attach mini felt pom poms to the pencil dots. You could also trace other shapes and use different color poms to suit your fancy. And disclaimer: this was the only wrapping style that felt like it took too long and got a little messy with the hot glue so I would suggest using a different glue (like Elmer’s!) for better precision and less burns!
For the remaining three gifts do the following:
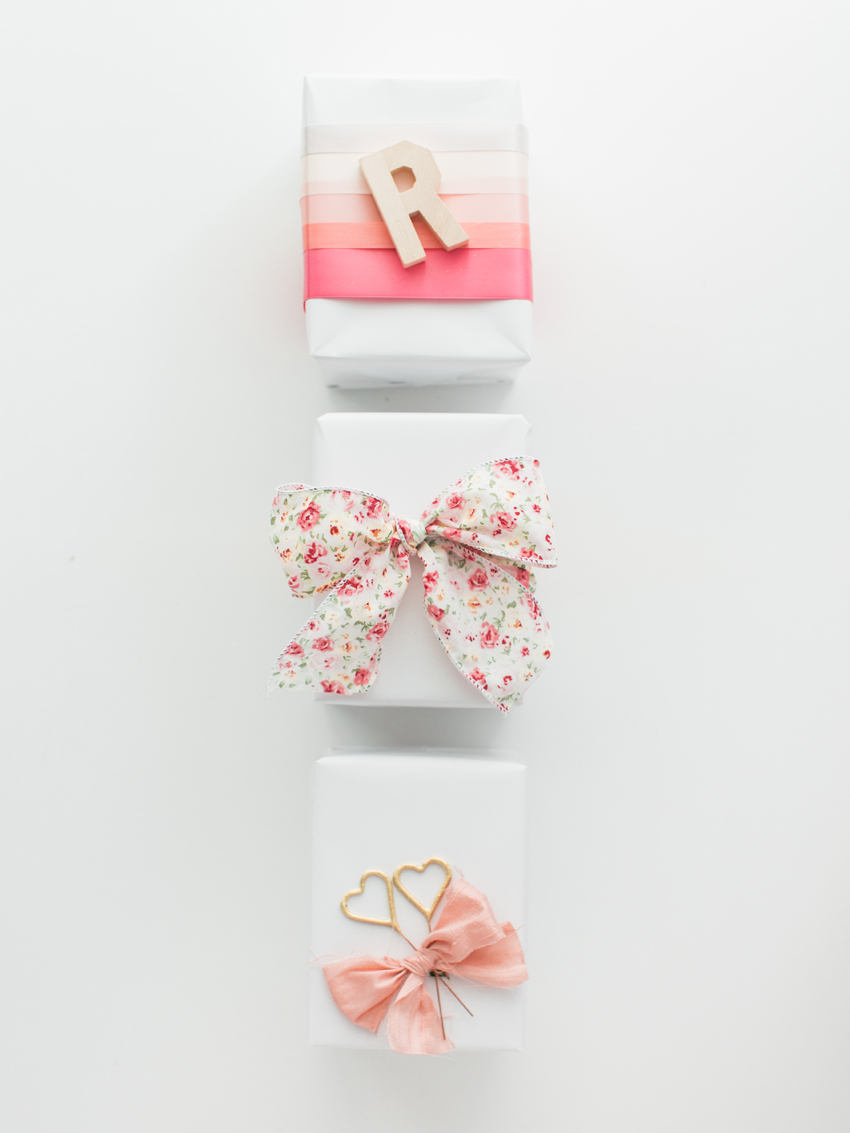
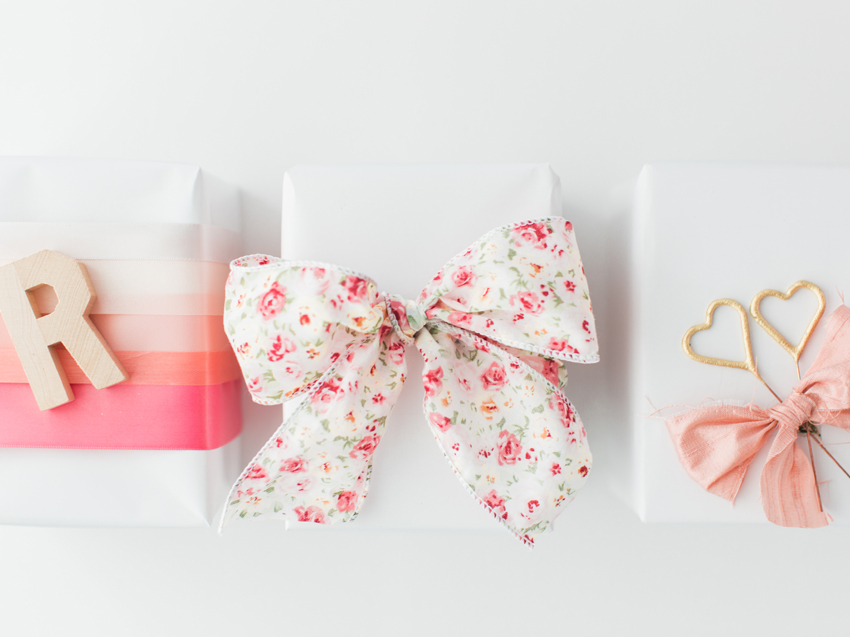
• Using many different strands of ombre shaded ribbon, wrap them around the entire package slightly overlapping each strand as you go and securing the ends onto the bottom of the package with hot glue. Then glue a wood cut out of the first letter of the recipient’s name onto the top. I’ve had this letter R for as long as I can remember but you can find similar letters at most craft stores.
• Using a pretty patterned piece of ribbon with wired edges, create a big bow for a striking and simple effect. Wired ribbon holds shape better than satin or silk and can allow you to manipulate your bow loops and ends.
• And finally, cross cross two heart shaped sparklers like these and glue them onto the wrapped box. Using a piece of duck cloth (more affordable) or silk like I used, cut out long strands in the desired width. Then tie your strands into little bows, trim your ends, and hot glue the bows overtop of the criss crossed sparklers.
Easy right? Beautiful wrapping CAN be easy and affordable.
And if you want to make sure you don’t miss out on any future blog posts, upcoming events and more, be sure to subscribe to the HGE newsletter here. There will be many fun things to share in the new year and we can’t wait to keep you in the know. Have a happy happy holiday my friends. Be well and be grateful.
Xoxo