
A paint-swatch chandelier? I think so :)
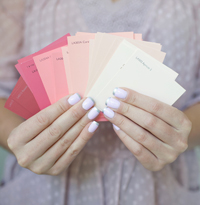
{Step 1} You’ll need a whole bunch of paint swatches in your desired colours (seriously, emphasis on the whole bunch part). I picked a variety of blush, pink and red hues so I could get a fancy ombre look to my chandelier but I can only imagine how many different looks you could go for with your own chandelier. Using a scalloped paper punch you’ll need to punch about 40 -60 swatches into little medallions. Keep the medallions divided by colours in little saucers or cups like below.
{Step 2} I bought my lamp shade (my chandelier base) from Lowes for about 5 bucks. Using an Exacto knife and super sharp metal scissors I carefully cut apart the fabric lamp shade, peeling away the pieces until the metal parts were as exposed as possible. When picking out a lamp shade I tried to pick out one where the bottom diameter is much smaller than the top. This will make your layers of paint swatch medallions hang better and thus look much better when the final product is done.
{Step 3} Lay out your paint medallions, coloured side down, in the desired order. Tape down a long piece of coloured thread along the middle of the backs of each medallion. Then using a piece of tape, cut down the center width wise, tape together the edges where one medallion meets the next. Without this final piece of tape, the medallions with rotate on their piece of thread, thus showing the bar codes, text and colour names usually located on the backs of the paint swatches. If that doesn’t bother you then this step isn’t necessary! Repeat this step until all of your chandelier strands are strung and taped together.
{Step 4} Flip your lamp shade upside down and fasten it somewhere where it can hang freely (I tied mine to the latch that opens and closes our air vent in our ceiling). Start stringing on your strands along the perimeter of the bottom of the chandelier until the entire metal base is covered. Then start stringing strands along the widest ‘top’ of your chandelier so that the lowest part of your strand hits the mid point of the bottom layer. Continue this all the way around until the entire chandelier is covered. Add a ribbon to the metal pieces (where the light bulb would pop in) and voila! You’re ready to hang this beauty!

Thanks to Jenna for the photos, as always. Hope everyone had the sweetest long weekend ever! Big hugs to you all xoxo